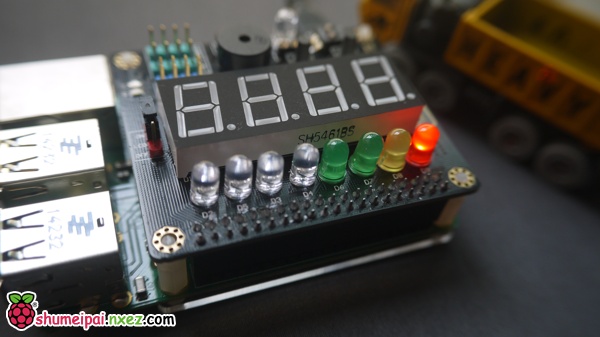
本文所介绍的内容基于树莓派瑞士军刀扩展板(SAKS),由于 SAKS 基于树莓派通用的 GPIO 设计,文中的原理和代码也适用于其他情况。
本文由树莓派实验室创作,遵循CC协议(署名-非商业性使用-禁止演绎-相同方式共享),欢迎树莓派爱好者们遵循协议内容转载传播。谢绝不遵守协议的转载和抄袭。
树莓派是精简版的微型电脑,连电源开关都精简掉了。要完成正常的关机和重启的操作,需要通过终端输入关机和重启命令才行。当树莓派没有配备显示器时,登录 SSH 关机更显得颇为麻烦。现在既然有了 SAKS 扩展板,为什么不用上面的轻触开关来实现一个关机和重启的按键功能呢?
本例程中涉及到的 SAKS 扩展板引脚编号如下:
| 功能 |
BOARD |
BCM |
wiringPi |
|
| 开关组 | 轻触开关(右) | 38 | 20 | 28 |
| LED排灯 74HC595 |
DS | 31 | 6 | 22 |
| SHCP | 35 | 19 | 24 | |
| STCP | 33 | 13 | 23 |
我们将要实现的功能,是将 SAKS 扩展板的 K1 轻触开关改造成树莓派的关机和重启键,同时配以两个 LED 来指示操作状态。
轻触开关1次,进入重启倒计时,绿色 LED 闪烁,倒计时为10秒,倒计时结束后立刻重启。
在重启倒计时过程中再次轻触开关1次,由重启倒计时切换到关机倒计时,红色 LED 闪烁,倒计时结束后立刻关机。
在关机倒计时过程中,再次轻触开关1次,取消倒计时,LED 停止闪烁,系统恢复正常运行。
这样一个按键配上两个 LED 就能实现关机、重启、取消指令的操作了。实现代码如下:
#!/usr/bin/env python
# coding=utf-8
import RPi.GPIO as GPIO
import time
import os,sys
import signal

#定义关机键和关机状态指示灯的GPIO引脚
GPIO.setmode(GPIO.BCM)
pin_btn = 20
DS = 6
SHCP = 19
STCP = 13

#初始化SAKS上相应按键,按键内部上拉
GPIO.setup(pin_btn, GPIO.IN, pull_up_down = GPIO.PUD_UP)

GPIO.setup(DS, GPIO.OUT)
GPIO.setup(SHCP, GPIO.OUT)
GPIO.setup(STCP, GPIO.OUT)

GPIO.output(DS, GPIO.LOW)
GPIO.output(SHCP, GPIO.LOW)
GPIO.output(STCP, GPIO.LOW)

#初始化按下关机键的次数
press_times = 0
#按下关机键后等待并倒数10次
count_down = 10
led_on_reboot = 0
led_on_halt = 0

def writeBit(data):
    GPIO.output(DS, data)

    GPIO.output(SHCP, GPIO.LOW)
    GPIO.output(SHCP, GPIO.HIGH)

#写入8位LED的状态
def writeByte(data):
    for i in range (0, 8):
        writeBit((data >> i) & 0x01)
    #状态刷新信号
    GPIO.output(STCP, GPIO.LOW)
    GPIO.output(STCP, GPIO.HIGH)

def onPress(channel):
    global press_times, count_down
    print('pressed')
    press_times += 1
    if press_times > 3:
        press_times = 1
    #重启模式
    if press_times == 1:
        #绿色LED亮
        writeByte(0x20)
        print('system will restart in %s' % (count_down))
    #关机模式
    elif press_times == 2:
        #红色LED亮
        writeByte(0x80)
        print('system will halt in %s' % (count_down))
    #模式取消
    elif press_times == 3:
        writeByte(0x00)
        print 'cancel'
        count_down = 10

#设置按键检测,检测到按下时调用 onPress 函数
GPIO.add_event_detect(pin_btn, GPIO.FALLING, callback = onPress, bouncetime = 500)

try:
    while True:
        #重启模式
        if press_times == 1:
            if count_down == 0:
                print "start restart"
                os.system("shutdown -r -t 5 now")
                sys.exit()
            led_on_reboot = not led_on_reboot
            #绿色 LED 闪烁
            if led_on_reboot:
                writeByte(0x20)
            else:
                writeByte(0x00)
        #关机模式
        if press_times == 2:
            if count_down == 0:
                print "start shutdown"
                os.system("shutdown  -t 5 now")
                sys.exit()
            led_on_halt = not led_on_halt
            #红色 LED 闪烁
            if led_on_halt:
                writeByte(0x80)
            else:
                writeByte(0x00)

        if press_times == 1 or press_times == 2:
            count_down -= 1
            print "%s second" % (count_down)
        time.sleep(1)
except KeyboardInterrupt:
    print('User press Ctrl+c, exit;')
finally:
    GPIO.cleanup()
接下来运行。
sudo python powerbutton.py
将这个脚本设为开机启动,编辑 rc.local:
vim /etc/rc.local
在 exit 0 所在行之前插入一行,文件路径需根据实际自行修改:
python /home/pi/powerbutton.py &
也可以直接在终端运行以下命令,从 GitHub 上下载源码运行:
sudo git clone https://github.com/spoonysonny/SAKS-tutorials.git
cd SAKS-tutorials/power-button
sudo python powerbutton.py
后面我们后面将开始介绍如何基于 SAKS 扩展板 DIY 各种有趣、实用的东西,欢迎持续关注!
本文属于《树莓派瑞士军刀扩展板(SAKS)DIY 教程》系列文章,查看系列文章目录,请访问:https://shumeipai.nxez.com/swiss-army-knife-shield-for-raspberry-pi-diy-tutorials