AI Camera
About
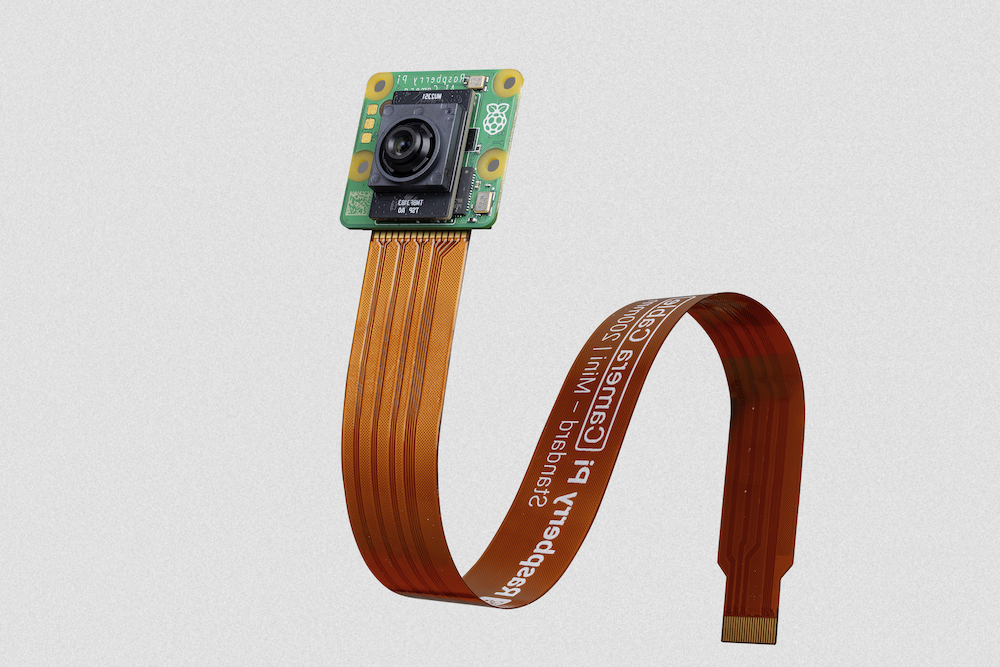
The Raspberry Pi AI Camera uses the Sony IMX500 imaging sensor to provide low-latency, high-performance AI capabilities to any camera application. Tight integration with Raspberry Pi’s camera software stack allows users to deploy their own neural network models with minimal effort.
This section demonstrates how to run either a pre-packaged or custom neural network model on the camera. Additionally, this section includes the steps required to interpret inference data generated by neural networks running on the IMX500 in rpicam-apps and Picamera2.
Getting started
The instructions below describe how to run the pre-packaged MobileNet SSD and PoseNet neural network models on the Raspberry Pi AI Camera.
Prerequisites
These instructions assume you are using the AI Camera attached to either a Raspberry Pi 4 Model B or Raspberry Pi 5 board. With minor changes, you can follow these instructions on other Raspberry Pi models with a camera connector, including the Raspberry Pi Zero 2 W and Raspberry Pi 3 Model B+.
First, ensure that your Raspberry Pi runs the latest software. Run the following command to update:
$ sudo apt update && sudo apt full-upgradeInstall the IMX500 firmware
The AI camera must download runtime firmware onto the IMX500 sensor during startup. To install these firmware files onto your Raspberry Pi, run the following command:
$ sudo apt install imx500-allThis command:
-
installs the
/lib/firmware/imx500_loader.fpkand/lib/firmware/imx500_firmware.fpkfirmware files required to operate the IMX500 sensor -
places a number of neural network model firmware files in
/usr/share/imx500-models/ -
installs the IMX500 post-processing software stages in
rpicam-apps -
installs the Sony network model packaging tools
|
Note
|
The IMX500 kernel device driver loads all the firmware files when the camera starts. This may take several minutes if the neural network model firmware has not been previously cached. The demos below display a progress bar on the console to indicate firmware loading progress. |
Run example applications
Once all the system packages are updated and firmware files installed, we can start running some example applications. As mentioned earlier, the Raspberry Pi AI Camera integrates fully with libcamera, rpicam-apps, and Picamera2.
rpicam-apps
The rpicam-apps camera applications include IMX500 object detection and pose estimation stages that can be run in the post-processing pipeline. For more information about the post-processing pipeline, see the post-processing documentation.
The examples on this page use post-processing JSON files located in /usr/share/rpicam-assets/.
Object detection
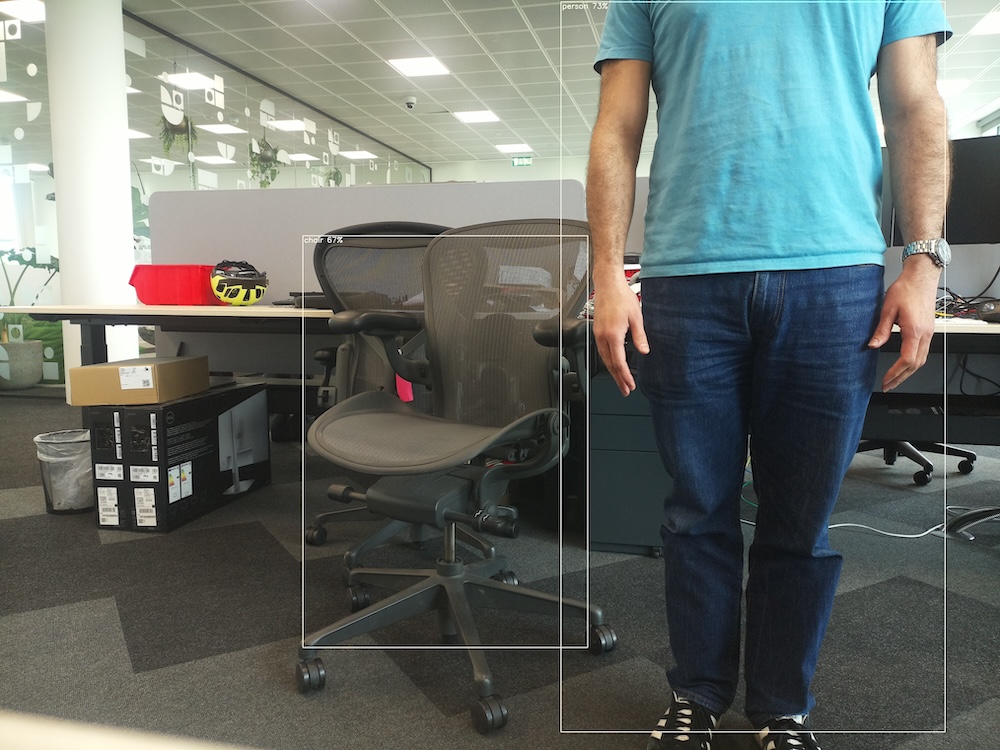
The MobileNet SSD neural network performs basic object detection, providing bounding boxes and confidence values for each object found. imx500_mobilenet_ssd.json contains the configuration parameters for the IMX500 object detection post-processing stage using the MobileNet SSD neural network.
imx500_mobilenet_ssd.json declares a post-processing pipeline that contains two stages:
-
imx500_object_detection, which picks out bounding boxes and confidence values generated by the neural network in the output tensor -
object_detect_draw_cv, which draws bounding boxes and labels on the image
The MobileNet SSD tensor requires no significant post-processing on your Raspberry Pi to generate the final output of bounding boxes. All object detection runs directly on the AI Camera.
The following command runs rpicam-hello with object detection post-processing:
$ rpicam-hello -t 0s --post-process-file /usr/share/rpi-camera-assets/imx500_mobilenet_ssd.json --viewfinder-width 1920 --viewfinder-height 1080 --framerate 30After running the command, you should see a viewfinder that overlays bounding boxes on objects recognised by the neural network:
To record video with object detection overlays, use rpicam-vid instead:
$ rpicam-vid -t 10s -o output.264 --post-process-file /usr/share/rpi-camera-assets/imx500_mobilenet_ssd.json --width 1920 --height 1080 --framerate 30You can configure the imx500_object_detection stage in many ways.
For example, max_detections defines the maximum number of objects that the pipeline will detect at any given time. threshold defines the minimum confidence value required for the pipeline to consider any input as an object.
The raw inference output data of this network can be quite noisy, so this stage also preforms some temporal filtering and applies hysteresis. To disable this filtering, remove the temporal_filter config block.
Pose estimation
The PoseNet neural network performs pose estimation, labelling key points on the body associated with joints and limbs. imx500_posenet.json contains the configuration parameters for the IMX500 pose estimation post-processing stage using the PoseNet neural network.
imx500_posenet.json declares a post-processing pipeline that contains two stages:
-
imx500_posenet, which fetches the raw output tensor from the PoseNet neural network -
plot_pose_cv, which draws line overlays on the image
The AI Camera performs basic detection, but the output tensor requires additional post-processing on your host Raspberry Pi to produce final output.
The following command runs rpicam-hello with pose estimation post-processing:
$ rpicam-hello -t 0s --post-process-file /usr/share/rpi-camera-assets/imx500_posenet.json --viewfinder-width 1920 --viewfinder-height 1080 --framerate 30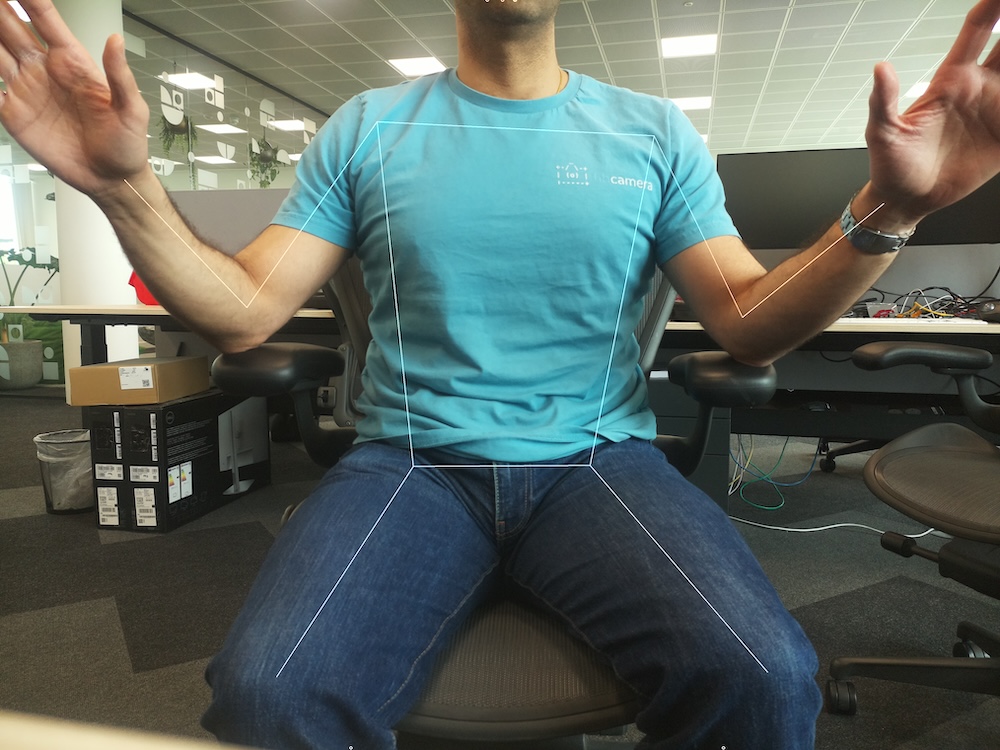
You can configure the imx500_posenet stage in many ways.
For example, max_detections defines the maximum number of bodies that the pipeline will detect at any given time. threshold defines the minimum confidence value required for the pipeline to consider input as a body.
Picamera2
For examples of image classification, object detection, object segmentation, and pose estimation using Picamera2, see the picamera2 GitHub repository.
Most of the examples use OpenCV for some additional processing. To install the dependencies required to run OpenCV, run the following command:
$ sudo apt install python3-opencv python3-munkresNow download the the picamera2 repository to your Raspberry Pi to run the examples. You’ll find example files in the root directory, with additional information in the README.md file.
Run the following script from the repository to run YOLOv8 object detection:
$ python imx500_object_detection_demo.py --model /usr/share/imx500-models/imx500_network_ssd_mobilenetv2_fpnlite_320x320_pp.rpkTo try pose estimation in Picamera2, run the following script from the repository:
$ python imx500_pose_estimation_higherhrnet_demo.pyUnder the hood
Overview
The Raspberry Pi AI Camera works differently from traditional AI-based camera image processing systems, as shown in the diagram below:

The left side demonstrates the architecture of a traditional AI camera system. In such a system, the camera delivers images to the Raspberry Pi. The Raspberry Pi processes the images and then performs AI inference. Traditional systems may use external AI accelerators (as shown) or rely exclusively on the CPU.
The right side demonstrates the architecture of a system that uses IMX500. The camera module contains a small Image Signal Processor (ISP) which turns the raw camera image data into an input tensor. The camera module sends this tensor directly into the AI accelerator within the camera, which produces output tensors that contain the inferencing results. The AI accelerator sends these tensors to the Raspberry Pi. There is no need for an external accelerator, nor for the Raspberry Pi to run neural network software on the CPU.
To fully understand this system, familiarise yourself with the following concepts:
- Input Tensor
-
The part of the sensor image passed to the AI engine for inferencing. Produced by a small on-board ISP which also crops and scales the camera image to the dimensions expected by the neural network that has been loaded. The input tensor is not normally made available to applications, though it is possible to access it for debugging purposes.
- Region of Interest (ROI)
-
Specifies exactly which part of the sensor image is cropped out before being rescaled to the size demanded by the neural network. Can be queried and set by an application. The units used are always pixels in the full resolution sensor output. The default ROI setting uses the full image received from the sensor, cropping no data.
- Output Tensors
-
The results of inferencing performed by the neural network. The precise number and shape of the outputs depend on the neural network. Application code must understand how to handle the tensors.
System architecture
The diagram below shows the various camera software components (in green) used during our imaging/inference use case with the Raspberry Pi AI Camera module hardware (in red):

At startup, the IMX500 sensor module loads firmware to run a particular neural network model. During streaming, the IMX500 generates both an image stream and an inference stream. This inference stream holds the inputs and outputs of the neural network model, also known as input/output tensors.
Device drivers
At the lowest level, the the IMX500 sensor kernel driver configures the camera module over the I2C bus. The CSI2 driver (CFE on Pi 5, Unicam on all other Pi platforms) sets up the receiver to write the image data stream into a frame buffer, together with the embedded data and inference data streams into another buffer in memory.
The firmware files also transfer over the I2C bus wires. On most devices, this uses the standard I2C protocol, but Raspberry Pi 5 uses a custom high speed protocol. The RP2040 SPI driver in the kernel handles firmware file transfer, since the transfer uses the RP2040 microcontroller. The microcontroller bridges the I2C transfers from the kernel to the IMX500 via a SPI bus. Additionally, the RP2040 caches firmware files in on-board storage. This avoids the need to transfer entire firmware blobs over the I2C bus, significantly speeding up firmware loading for firmware you’ve already used.
libcamera
Once libcamera dequeues the image and inference data buffers from the kernel, the IMX500 specific cam-helper library (part of the Raspberry Pi IPA within libcamera) parses the inference buffer to access the input/output tensors. These tensors are packaged as Raspberry Pi vendor-specific libcamera controls. libcamera returns the following controls:
| Control | Description |
|---|---|
|
Floating point array storing the output tensors. |
|
Floating point array storing the input tensor. |
|
Network specific parameters describing the output tensors' structure: |
|
Network specific parameters describing the input tensor’s structure: |
rpicam-apps
rpicam-apps provides an IMX500 post-processing stage base class that implements helpers for IMX500 post-processing stages: IMX500PostProcessingStage. Use this base class to derive a new post-processing stage for any neural network model running on the IMX500. For an example, see imx500_object_detection.cpp:
class ObjectDetection : public IMX500PostProcessingStage
{
public:
ObjectDetection(RPiCamApp *app) : IMX500PostProcessingStage(app) {}
char const *Name() const override;
void Read(boost::property_tree::ptree const ¶ms) override;
void Configure() override;
bool Process(CompletedRequestPtr &completed_request) override;
};For every frame received by the application, the Process() function is called (ObjectDetection::Process() in the above case). In this function, you can extract the output tensor for further processing or analysis:
auto output = completed_request->metadata.get(controls::rpi::CnnOutputTensor);
if (!output)
{
  LOG_ERROR("No output tensor found in metadata!");
  return false;
}

std::vector<float> output_tensor(output->data(), output->data() + output->size());
Once completed, the final results can either be visualised or saved in metadata and consumed by either another downstream stage, or the top level application itself. In the object inference case:
if (objects.size())
  completed_request->post_process_metadata.Set("object_detect.results", objects);
The object_detect_draw_cv post-processing stage running downstream fetches these results from the metadata and draws the bounding boxes onto the image in the ObjectDetectDrawCvStage::Process() function:
std::vector<Detection> detections;
completed_request->post_process_metadata.Get("object_detect.results", detections);
The following table contains a full list of helper functions provided by IMX500PostProcessingStage:
| Function | Description |
|---|---|
|
Typically called from This function also reads the neural network model file string ( |
|
Typically called from |
|
Sets an absolute region of interest (ROI) crop rectangle on the sensor image to use for inferencing on the IMX500. |
|
Automatically calculates region of interest (ROI) crop rectangle on the sensor image to preserve the input tensor aspect ratio for a given neural network. |
|
Displays a progress bar on the console showing the progress of the neural network firmware upload to the IMX500. |
|
Converts from the input tensor coordinate space to the final ISP output image space. There are a number of scaling/cropping/translation operations occurring from the original sensor image to the fully processed ISP output image. This function converts coordinates provided by the output tensor to the equivalent coordinates after performing these operations. |
Picamera2
IMX500 integration in Picamera2 is very similar to what is available in rpicam-apps. Picamera2 has an IMX500 helper class that provides the same functionality as the rpicam-apps IMX500PostProcessingStage base class. This can be imported to any Python script with:
from picamera2.devices.imx500 import IMX500

# This must be called before instantiation of Picamera2
imx500 = IMX500(model_file)
To retrieve the output tensors, fetch them from the controls. You can then apply additional processing in your Python script.
For example, in an object inference use case such as imx500_object_detection_demo.py, the object bounding boxes and confidence values are extracted in parse_detections() and draw the boxes on the image in draw_detections():
class Detection:
    def __init__(self, coords, category, conf, metadata):
        """Create a Detection object, recording the bounding box, category and confidence."""
        self.category = category
        self.conf = conf
        obj_scaled = imx500.convert_inference_coords(coords, metadata, picam2)
        self.box = (obj_scaled.x, obj_scaled.y, obj_scaled.width, obj_scaled.height)

def draw_detections(request, detections, stream="main"):
    """Draw the detections for this request onto the ISP output."""
    labels = get_labels()
    with MappedArray(request, stream) as m:
        for detection in detections:
            x, y, w, h = detection.box
            label = f"{labels[int(detection.category)]} ({detection.conf:.2f})"
            cv2.putText(m.array, label, (x + 5, y + 15), cv2.FONT_HERSHEY_SIMPLEX, 0.5, (0, 0, 255), 1)
            cv2.rectangle(m.array, (x, y), (x + w, y + h), (0, 0, 255, 0))
        if args.preserve_aspect_ratio:
            b = imx500.get_roi_scaled(request)
            cv2.putText(m.array, "ROI", (b.x + 5, b.y + 15), cv2.FONT_HERSHEY_SIMPLEX, 0.5, (255, 0, 0), 1)
            cv2.rectangle(m.array, (b.x, b.y), (b.x + b.width, b.y + b.height), (255, 0, 0, 0))

def parse_detections(request, stream='main'):
    """Parse the output tensor into a number of detected objects, scaled to the ISP output."""
    outputs = imx500.get_outputs(request.get_metadata())
    boxes, scores, classes = outputs[0][0], outputs[1][0], outputs[2][0]
    detections = [ Detection(box, category, score, metadata)
                   for box, score, category in zip(boxes, scores, classes) if score > threshold]
    draw_detections(request, detections, stream)
Unlike the rpicam-apps example, this example applies no additional hysteresis or temporal filtering.
The IMX500 class in Picamera2 provides the following helper functions:
| Function | Description |
|---|---|
|
Return the full sensor resolution of the IMX500. |
|
Returns a dictionary of the neural network configuration. |
|
Converts the coordinates coords from the input tensor coordinate space to the final ISP output image space. Must be passed Picamera2’s image metadata for the image, and the Picamera2 object. There are a number of scaling/cropping/translation operations occurring from the original sensor image to the fully processed ISP output image. This function converts coordinates provided by the output tensor to the equivalent coordinates after performing these operations. |
|
Displays a progress bar on the console showing the progress of the neural network firmware upload to the IMX500. |
|
Returns the region of interest (ROI) in the ISP output image coordinate space. |
|
Returns the ISP output image size. |
|
Returns the input tensor size based on the neural network model used. |
|
Returns the output tensors from the Picamera2 image metadata. |
|
Returns the shape of the output tensors from the Picamera2 image metadata for the neural network model used. |
|
Sets the region of interest (ROI) crop rectangle which determines which part of the sensor image is converted to the input tensor that is used for inferencing on the IMX500. The region of interest should be specified in units of pixels at the full sensor resolution, as a |
|
Automatically calculates region of interest (ROI) crop rectangle on the sensor image to preserve the given aspect ratio. To make the ROI aspect ratio exactly match the input tensor for this network, use |
|
Returns the frame-level performance indicators logged by the IMX500 for the given image metadata. |
Model deployment
To deploy a new neural network model to the Raspberry Pi AI Camera, complete the following steps:
-
Provide a neural network model.
-
Quantise and compress the model so that it can run using the resources available on the IMX500 camera module.
-
Convert the compressed model to IMX500 format.
-
Package the model into a firmware file that can be loaded at runtime onto the camera.
The first three steps will normally be performed on a more powerful computer such as a desktop or server. You must run the final packaging step on a Raspberry Pi.
Model creation
The creation of neural network models is beyond the scope of this guide. Existing models can be re-used, or new ones created using popular frameworks like TensorFlow or PyTorch.
For more information, see the official AITRIOS developer website.
Quantisation and compression
Models are quantised and compressed using Sony’s Model Compression Toolkit. To install the toolkit, run the following command:
$ pip install model_compression_toolkitFor more information, see the Sony model optimization GitHub repository.
The Model Compression Toolkit generates a quantised model in the following formats:
-
Keras (TensorFlow)
-
ONNX (PyTorch)
Conversion
To convert a model, first install the converter tools:
-
TensorFlow
-
PyTorch
$ pip install imx500-converter[tf]|
Tip
|
Always use the same version of TensorFlow you used to compress your model. |
$ pip install imx500-converter[pt]If you need to install both packages, use two separate Python virtual environments. This prevents TensorFlow and PyTorch from causing conflicts with one another.
Next, convert the model:
-
TensorFlow
-
PyTorch
$ imxconv-tf -i <compressed Keras model> -o <output folder>$ imxconv-pt -i <compressed ONNX model> -o <output folder>Both commands create an output folder that contains a memory usage report and a packerOut.zip file.
For optimal use of the memory available to the accelerator on the IMX500 sensor, add --no-input-persistency to the above commands. However, this will disable input tensor generation and return to the application for debugging purposes.
For more information on the model conversion process, see the official Sony IMX500 Converter documentation.
Packaging
|
Important
|
You must run this step on a Raspberry Pi. |
The final step packages the model into an RPK file. When running the neural network model, we’ll upload this file to the AI Camera. Before proceeding, run the following command to install the necessary tools:
$ sudo apt install imx500-toolsTo package the model into an RPK file, run the following command:
$ imx500-package -i <path to packerOut.zip> -o <output folder>This command should create a file named network.rpk in the output folder. You’ll pass the name of this file to your IMX500 camera applications.
For a more comprehensive set of instructions and further specifics on the tools used, see the Sony IMX500 Packager documentation.