Sense HAT
About
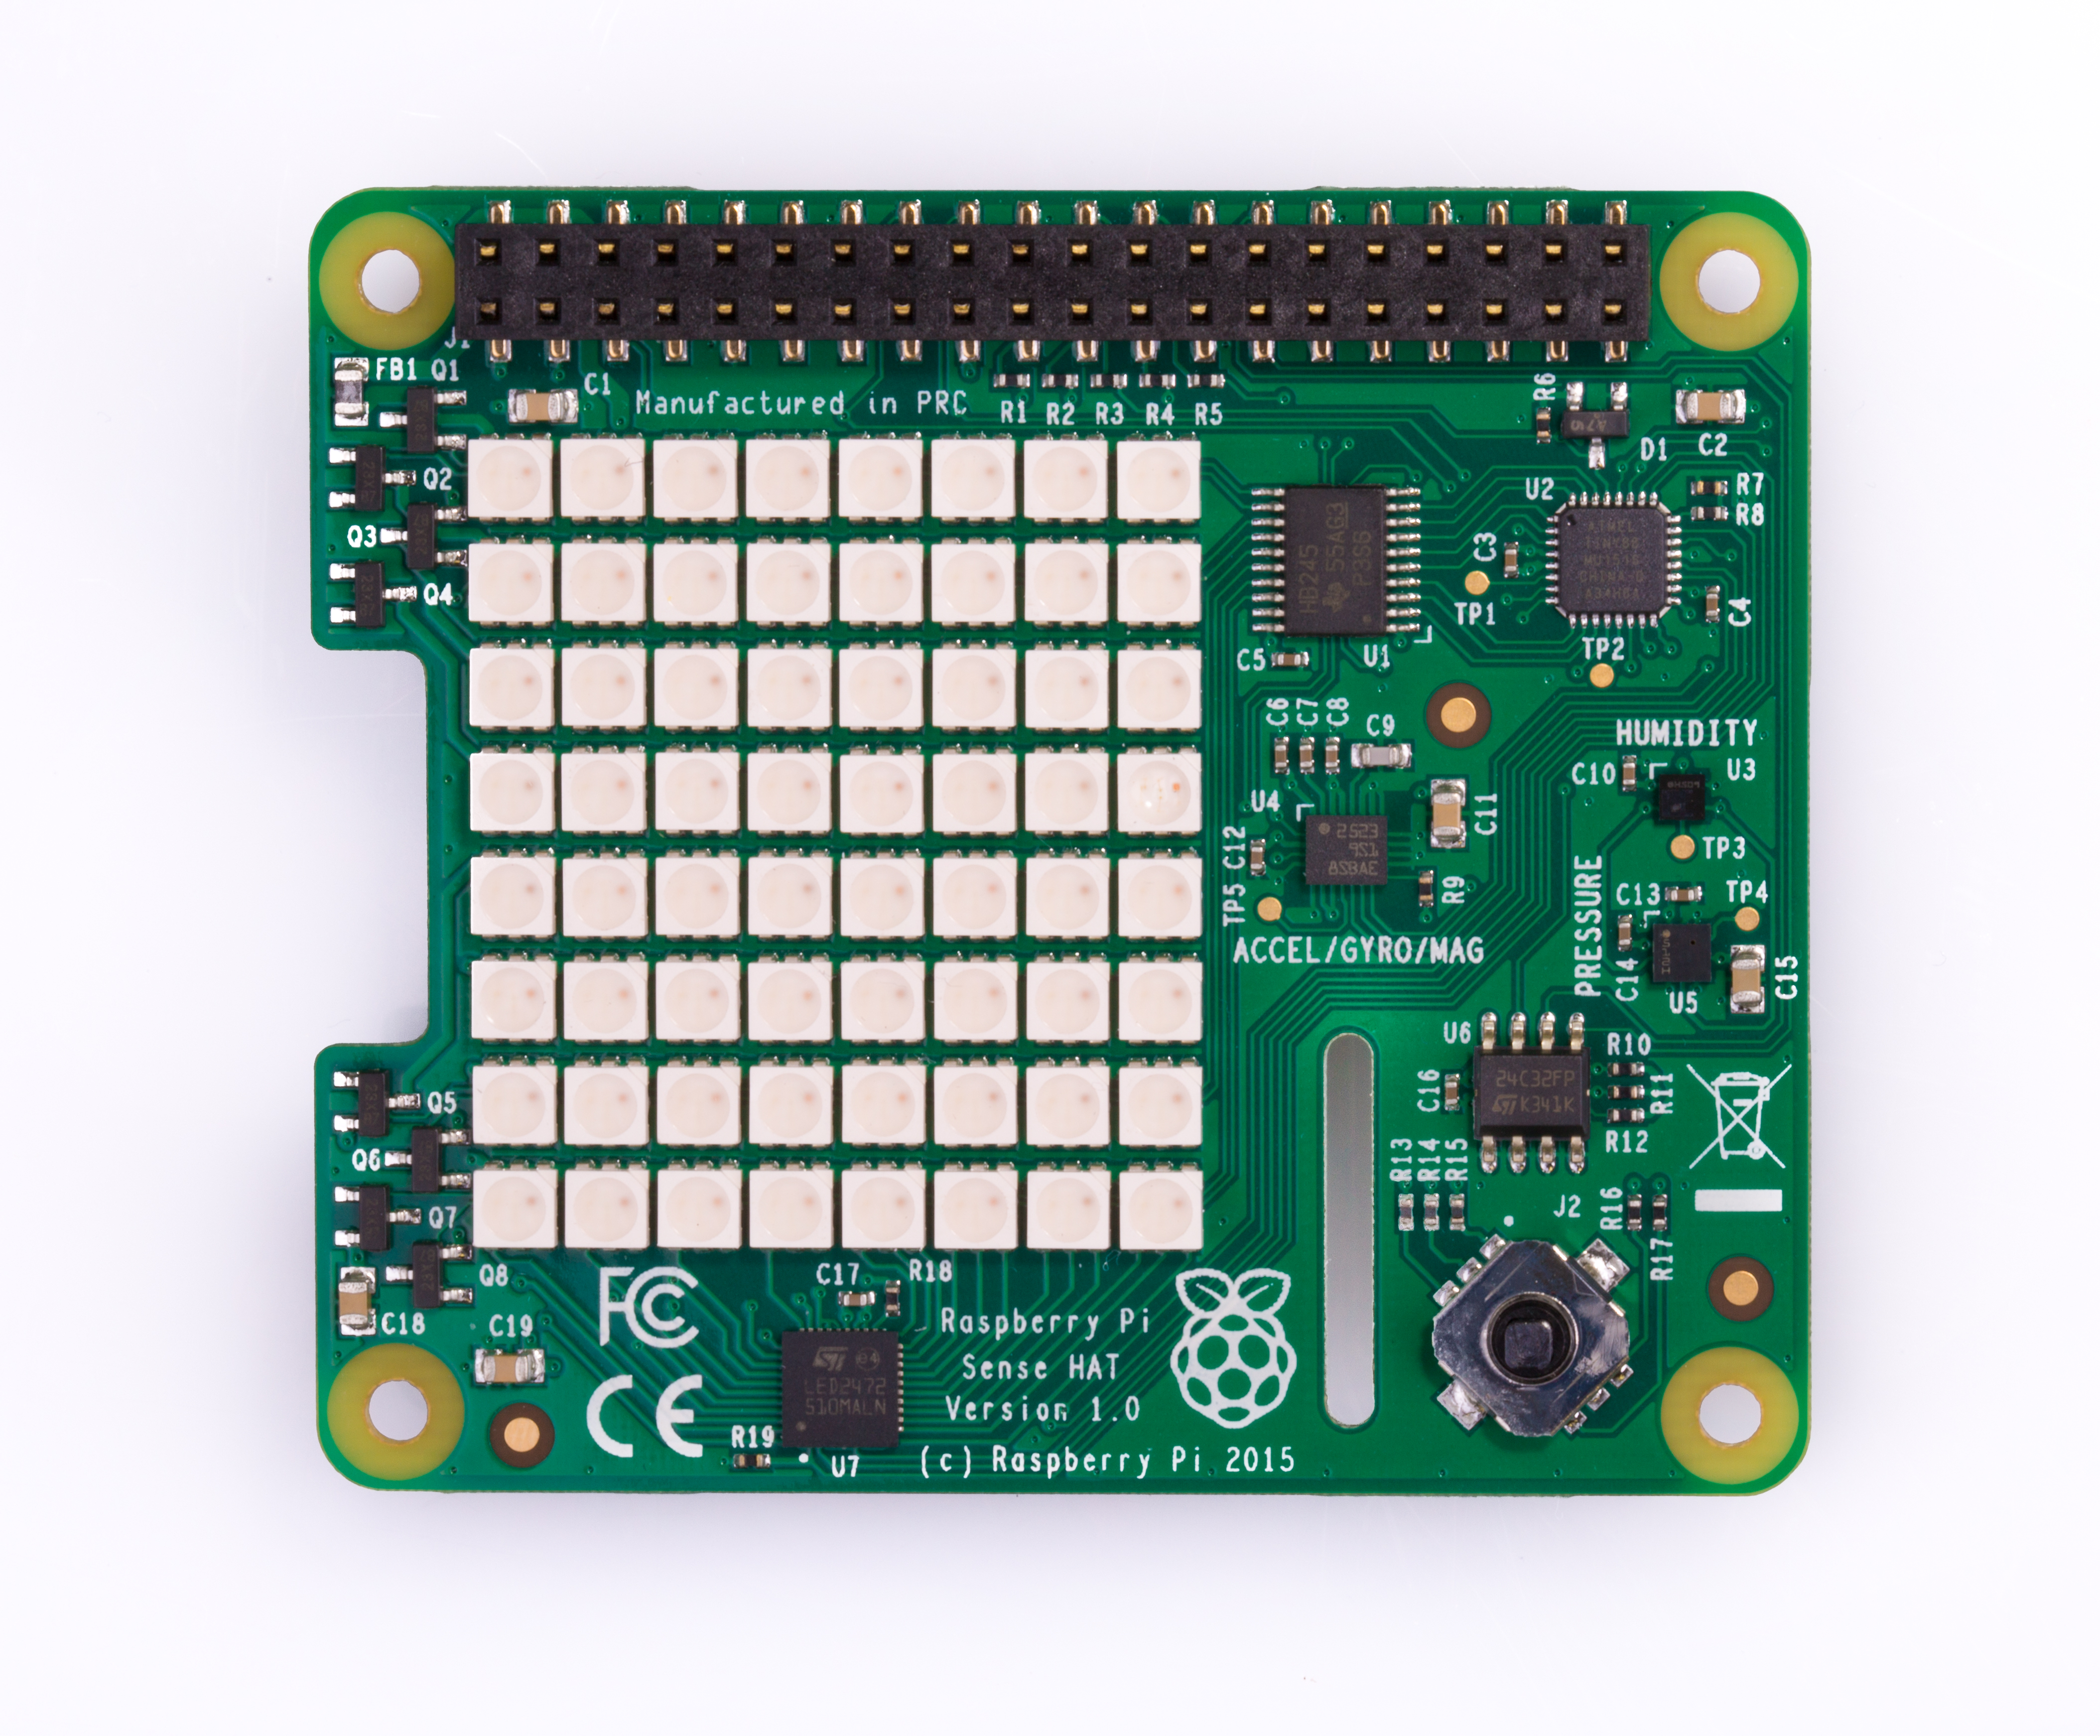
The Raspberry Pi Sense HAT is an add-on board that gives your Raspberry Pi an array of sensing capabilities. The on-board sensors allow you to monitor pressure, humidity, temperature, colour, orientation, and movement. The 8×8 RGB LED matrix allows you to visualise data from the sensors. The five-button joystick lets users interact with your projects.
The Sense HAT was originally developed for use on the International Space Station as part of the educational Astro Pi programme run by the Raspberry Pi Foundation in partnership with the European Space Agency. It can help with any project that requires position, motion, orientation, or environmental sensing.
An officially supported Python library provides access to the on-board sensors, LED matrix, and joystick. The Sense HAT is compatible with any Raspberry Pi device with a 40-pin GPIO header.
Features
The Sense HAT has an 8×8 RGB LED matrix and a five-button joystick, and includes the following sensors:
-
Gyroscope
-
Accelerometer
-
Magnetometer
-
Temperature
-
Barometric pressure
-
Humidity
-
Colour and brightness
Schematics and mechanical drawings for the Sense HAT and the Sense HAT V2 are available for download.
LED matrix
The LED matrix is an RGB565 framebuffer with the id RPi-Sense FB. The appropriate device node can be written to as a standard file or mmap-ed. The included snake example shows how to access the framebuffer.
Joystick
The joystick comes up as an input event device named Raspberry Pi Sense HAT Joystick, mapped to the arrow keys and Enter. It should be supported by any library which is capable of handling inputs, or directly through the evdev interface. Suitable libraries include SDL, pygame and python-evdev. The included snake example shows how to access the joystick directly.
Install
In order to work correctly, the Sense HAT requires:
-
an up-to-date kernel
-
I2C enabled on your Raspberry Pi
-
a few dependencies
Complete the following steps to get your Raspberry Pi device ready to connect to the Sense HAT:
-
First, ensure that your Raspberry Pi runs the latest software. Run the following command to update:
$ sudo apt update && sudo apt full-upgrade -
Next, install the
sense-hatpackage, which will ensure the kernel is up to date, enable I2C, and install the necessary dependencies:$ sudo apt install sense-hat -
Finally, reboot your Raspberry Pi to enable I2C and load the new kernel, if it changed:
$ sudo reboot
Calibrate
Install the necessary software and run the calibration program as follows:
$ sudo apt update
$ sudo apt install octave -y
$ cd
$ cp /usr/share/librtimulib-utils/RTEllipsoidFit ./ -a
$ cd RTEllipsoidFit
$ RTIMULibCal
The calibration program displays the following menu:
Options are:

  m - calibrate magnetometer with min/max
  e - calibrate magnetometer with ellipsoid (do min/max first)
  a - calibrate accelerometers
  x - exit

Enter option:
Press lowercase m. The following message will then show. Press any key to start.
Magnetometer min/max calibration
-------------------------------
Waggle the IMU chip around, ensuring that all six axes
(+x, -x, +y, -y and +z, -z) go through their extrema.
When all extrema have been achieved, enter 's' to save, 'r' to reset
or 'x' to abort and discard the data.

Press any key to start...
After it starts, you should see output similar to the following scrolling up the screen:
Min x:  51.60  min y:  69.39  min z:  65.91
Max x:  53.15  max y:  70.97  max z:  67.97
Focus on the two lines at the very bottom of the screen, as these are the most recently posted measurements from the program.
Now, pick up the Raspberry Pi and Sense HAT and move it around in every possible way you can think of. It helps if you unplug all non-essential cables to avoid clutter.
Try and get a complete circle in each of the pitch, roll and yaw axes. Take care not to accidentally eject the SD card while doing this. Spend a few minutes moving the Sense HAT, and stop when you find that the numbers are not changing any more.
Now press lowercase s then lowercase x to exit the program. If you run the ls command now, you’ll see a new RTIMULib.ini file has been created.
In addition to those steps, you can also do the ellipsoid fit by performing the steps above, but pressing e instead of m.
When you’re done, copy the resulting RTIMULib.ini to /etc/ and remove the local copy in ~/.config/sense_hat/:
$ rm ~/.config/sense_hat/RTIMULib.ini
$ sudo cp RTIMULib.ini /etc
Getting started
After installation, example code can be found under /usr/src/sense-hat/examples.
Use the Sense HAT with Python
sense-hat is the officially supported library for the Sense HAT; it provides access to all of the on-board sensors and the LED matrix.
Complete documentation for the library can be found at sense-hat.readthedocs.io.
Use the Sense HAT with C++
RTIMULib is a C++ and Python library that makes it easy to use 9-dof and 10-dof IMUs with embedded Linux systems. A pre-calibrated settings file is provided in /etc/RTIMULib.ini, which is also copied and used by sense-hat. The included examples look for RTIMULib.ini in the current working directory, so you may wish to copy the file there to get more accurate data.
The RTIMULibDrive11 example comes pre-compiled to help ensure everything works as intended. It can be launched by running RTIMULibDrive11 and closed by pressing Ctrl C.
|
Note
|
The C/C++ examples can be compiled by running make in the appropriate directory.
|
Troubleshooting
Read and write EEPROM data
These steps are provided for debugging purposes only.
|
Note
|
On Raspberry Pi 2 Model B Rev 1.0 and Raspberry Pi 3 Model B boards, these steps may not work. The firmware will take control of I2C0, causing the ID pins to be configured as inputs. |
Before you can read and write EEPROM data to and from the Sense HAT, you must complete the following steps:
-
Enable I2C0 and I2C1 by adding the following line to the
/boot/firmware/config.txtfile:dtparam=i2c_vc=on dtparam=i2c_arm=on -
Run the following command to reboot:
$ sudo reboot -
Download and build the flash tool:
$ git clone https://github.com/raspberrypi/hats.git
$ cd hats/eepromutils
$ make
Read
To read EEPROM data, run the following command:
$ sudo ./eepflash.sh -f=sense_read.eep -t=24c32 -rWrite
|
Note
|
This operation will not damage your Raspberry Pi or Sense HAT, but if an error occurs, your Raspberry Pi may fail to automatically detect the HAT. |
-
First, download EEPROM settings and build the
.eepbinary:$ wget https://github.com/raspberrypi/rpi-sense/raw/master/eeprom/eeprom_settings.txt -O sense_eeprom.txt $ ./eepmake sense_eeprom.txt sense.eep /boot/firmware/overlays/rpi-sense-overlay.dtb -
Next, disable write protection:
$ i2cset -y -f 1 0x46 0xf3 1 -
Write the EEPROM data:
$ sudo ./eepflash.sh -f=sense.eep -t=24c32 -w -
Finally, re-enable write protection:
$ i2cset -y -f 1 0x46 0xf3 0